Old dining chairs often look tired before they become unusable. Scratched frames, faded fabric, loose joints, and flattened cushions can make a room feel neglected. Yet replacing an entire set may waste sound timber and functional hardware. The U.S. Environmental Protection Agency reported that furniture and furnishings generated approximately 12.1 million tons of municipal solid waste in 2018, with most sent to landfill. That figure gives restoration a practical environmental purpose, not merely a decorative one.
This guide explains how to update old dining chairs without reupholstering, using accessible repair and finishing methods. You might clean the fabric, add tailored seat covers, repaint the frame, replace worn foam, or install new webbing beneath the cushion. Small details matter. A warm oak frame can suit a neutral washable cover, while black paint can sharpen a dated ladder-back design. Inspect every joint first. Tighten loose screws, test the chair on a flat floor, and repair cracks before applying finishes. Do not hide structural problems with paint.
The Ellen MacArthur Foundation’s circular-design research emphasizes keeping products and materials in use longer. Chair updates support that principle when repairs are durable and thoughtfully chosen. Still, not every makeover succeeds. Thick paint can clog carved details, and cheap covers may shift during dinner. I have found that measuring twice prevents most avoidable mistakes. This article will compare practical options, realistic costs, and common errors, helping you choose an update that looks intentional rather than improvised.
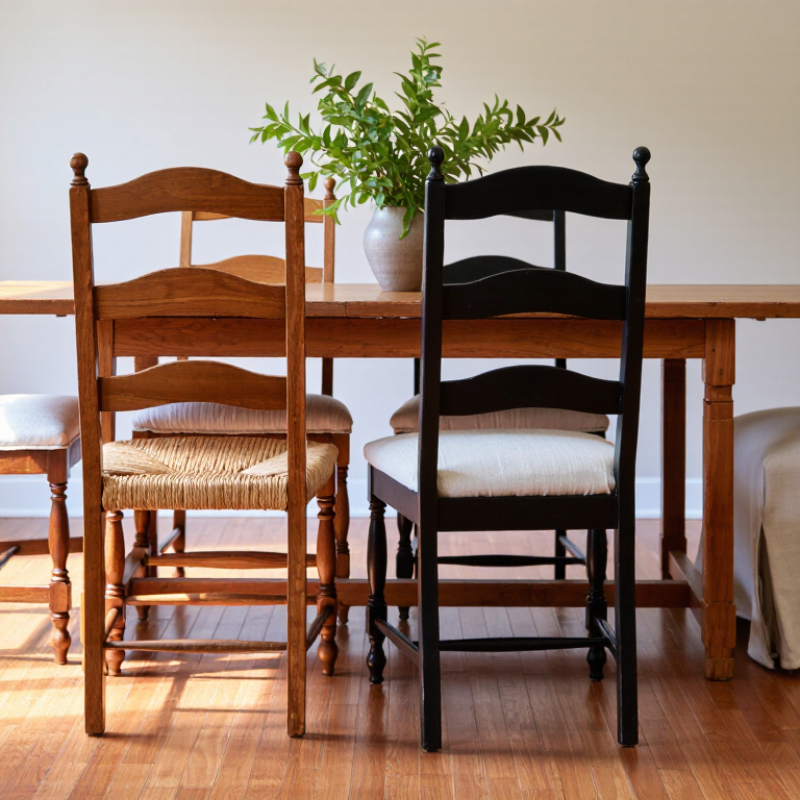
Assess the Chair’s Condition and Choose an Update Method
Before updating an old dining chair, inspect its structure under bright light. Hold the backrest and gently rock the frame. Any movement may indicate loose joints, cracked wood, or missing screws. Listen for cracks. Do not rush.
Check the seat base, springs, and fabric edges. A firm seat with faded fabric may only need a fitted cover or a new cushion layer. If the wood feels dry, clean it with a mild solution and let it dry completely. Avoid soaking joints. Moisture can worsen hidden damage. In my workshop experience, strong odors, insect holes, or extensive mold usually require professional assessment before cosmetic work.
Choose the update method according to the chair’s condition. Solid wood with surface scratches can receive light sanding and a compatible finish. A dated color may respond well to careful painting, but test a hidden area first. A removable seat pad allows a fabric change without reupholstering the chair. You can also add simple details, such as new seat ties or a contrasting backrest cover. I once painted a chair too quickly, and the grain looked flat afterward. That mistake taught me to preserve good wood instead of covering it automatically. Slight imperfections can add character. Major structural weaknesses should not be disguised with decoration. Test the chair with gradual pressure before returning it to daily use.
Clean, Repair, and Prepare the Dining Chair
Before changing fabric, inspect the chair as if it were a small structure. I start by photographing loose joints, stains, scratches, and missing screws. The U.S. Environmental Protection Agency reported 12.1 million tons of furniture and furnishings entering the waste stream in 2018. Careful preparation can keep one usable chair from joining that flow. Remove dust with a soft brush, then vacuum seams and underside areas. Test any cleaner beneath the seat first. Water rings can become permanent marks.
Use a pH-neutral soap, diluted carefully, on sealed wood. Avoid soaking joints, because trapped moisture can weaken old adhesive. Wipe with a barely damp cloth, then dry immediately. For greasy fingerprints, two light passes work better than one aggressive scrub. I once sanded an old frame too heavily. It looked clean, but its softened edges lost character. That mistake still informs my process.
Check every joint by gently rocking the chair. Tighten accessible screws, replace damaged fasteners, and apply suitable wood adhesive only where joints separate. Do not glue over dirt or cracked material. The American Society for Testing and Materials emphasizes consistent preparation and inspection in furniture-related testing practices. A dining chair should sit level without creaking or shifting. Repair before cleaning again if dust falls from a split joint. Fill deep scratches sparingly, then smooth them with fine abrasive paper. Leave a few honest marks. Perfect surfaces can look less convincing than carefully maintained ones.
Refresh the Frame With Paint, Stain, or Protective Finish
An old dining chair can look remarkably fresh without new fabric. The frame often needs more attention than the seat. In my workshop, I begin by checking every joint, screw, and corner for movement. Tighten loose hardware before touching the finish. A beautiful surface cannot hide a weak chair.
Clean the frame with mild soap and water, then let it dry completely. Remove grease near the hands and table edge. Lightly sand glossy areas with fine-grit paper. Do not sand aggressively, or you may erase useful wood details. Paint works well over mixed materials and dated colors. Apply thin coats with a small angled brush, allowing each coat to dry fully. A soft sage green, warm white, or deep charcoal can change the chair’s character. I once rushed the second coat. It showed every brush mark.
Stain requires more preparation because it needs exposed wood. Sand evenly, wipe away dust, and test the color underneath the seat. Different wood sections may absorb stain unevenly. That is not always a flaw. It can create honest variation. Finish painted or stained frames with a durable clear protective coat. Use satin for a practical balance between softness and cleaning resistance. Keep the chair unused until the finish has cured, not merely dried. Follow the product’s stated curing time. Patience matters here. Surface protection is easy to underestimate.
Update the Seat Using Slipcovers, Cushions, or Decorative Fabric
Updating old dining chairs does not require removing staples or replacing the entire frame. A fitted slipcover can hide faded upholstery and loose seams. Choose washable cotton or a durable linen blend for everyday dining. For a firmer seat, place a new foam pad under a cushion cover. Medium-density foam usually balances comfort and support better than very soft foam.
The U.S. Environmental Protection Agency’s 2018 Facts and Figures report recorded 12.1 million tons of furniture and furnishings entering the municipal waste stream. About 80% was landfilled. Reusing a sound chair frame with a new cover can reduce unnecessary disposal, although fabric production still has an environmental cost.
Tips: Measure twice. Record the seat width, depth, and cushion thickness. Add about 2 inches for seams and overlap. Secure decorative fabric beneath the seat with upholstery tacks or a staple gun. Keep the pattern centered before fastening. Test the fabric on one hidden corner first. A small mismatch may remain. That is acceptable, but rushed cutting is not. I prefer removable covers because dining chairs collect crumbs, sauce, and fingerprints quickly. Wash the fabric according to its care label, and avoid overly tight covers that strain the seams. A cushion with a nonslip backing can stay in place without permanently changing the chair.
How to Update Old Dining Chairs Without Reupholstering? — Update the Seat Using Slipcovers, Cushions, or Decorative Fabric
| Update Method |
Typical Material Cost per Chair |
Estimated Time per Chair |
Skill Level |
Comfort Improvement |
Cleaning and Maintenance |
Expected Service Life |
Best For |
| Removable Slipcover |
$15–$45 |
20–45 minutes |
Easy |
Moderate |
Easy to remove and machine-wash when the fabric care label allows it. |
2–5 years with regular use |
Quick seasonal changes, rental homes, and chairs with usable existing cushions. |
| Tied or Attached Seat Cushion |
$20–$60 |
30–60 minutes |
Easy |
High |
Use a washable cover or spot-clean the cushion; removable ties make cleaning easier. |
2–4 years, depending on foam and fabric quality |
Hard wooden seats, long meals, and chairs that need extra padding. |
| Decorative Fabric Seat Cover |
$10–$35 |
30–75 minutes |
Easy to Moderate |
Low to Moderate |
Vacuum or spot-clean regularly; fabric can be replaced without changing the padding. |
1–4 years, depending on abrasion and household use |
Adding color, pattern, or texture while preserving the original seat. |
| Fabric Wrapped Over Existing Seat |
$12–$40 |
45–90 minutes |
Moderate |
Moderate |
Clean gently because staples and exposed edges may make washing impractical. |
3–7 years when the existing foam and base are still sound |
A tailored appearance without removing the original upholstery. |
| Decorative Throw or Chair Scarf |
$8–$25 |
5–15 minutes |
Very Easy |
Low |
Usually easy to remove for washing, although loose fabric may need frequent adjustment. |
1–2 years with frequent repositioning |
Temporary makeovers, special occasions, and low-cost color updates. |
| Cushion with Non-Slip Pad |
$18–$55 |
15–35 minutes |
Easy |
High |
Remove the cushion and clean the cover; inspect the pad periodically for wear. |
2–5 years, depending on cushion density and use |
Seats that feel too firm or cushions that slide during everyday dining. |
Practical selection guide: Choose a slipcover for the easiest washable update, a cushion for the greatest comfort improvement, and decorative fabric for the most visible style change. Before covering a chair, check that the frame is stable and that the seat base, foam, and fasteners are free from moisture damage or significant wear.
Reassemble the Chair and Check Its Comfort and Durability
After refreshing an old dining chair, reassemble it on a level surface. Keep every screw, washer, and corner block in its original position. A small mistake here can create an uneven seat or a dangerous wobble. I once tightened one rear leg too early, and the frame twisted slightly. Loosening it saved the chair.
Apply wood adhesive only to clean, close-fitting joints. Remove excess glue with a damp cloth before it hardens. Tighten fasteners gradually, alternating between opposite sides. This method distributes pressure more evenly. Do not force a screw into damaged wood. A longer fastener may split the leg instead of strengthening it. Let the adhesive cure according to its instructions, even if the chair feels firm sooner.
Test the chair carefully before regular use. Press down on each corner, then rock it gently from side to side. Listen for clicks, creaks, or new movement. Sit slowly and check whether the seat feels level. Place both feet on the floor. The chair should support your weight without shifting. For extra confidence, add light pressure several times before attempting a full sitting test. Check the joints again after twenty-four hours. This step is easy to skip. It should not be. I sometimes find a minor looseness only after the first test, especially near older corner blocks. Correct that weakness before placing the chair around the dining table.
Conclusion
Learning how to update old dining chairs without reupholstering begins with assessing their condition and deciding which improvements are needed. Check the frame for loose joints, cracks, or damage, then clean away dust, grease, and old residue. Make basic repairs and allow the chair to dry completely before refreshing its appearance. Depending on the style and condition, the frame can be enhanced with paint, stain, or a protective finish, creating a cleaner and more coordinated look while helping preserve the wood.
The seat can be updated without removing its original upholstery by adding a fitted slipcover, a comfortable cushion, or carefully arranged decorative fabric. Choose materials that suit the room and can withstand regular use. After making the changes, reassemble any removed parts, tighten the hardware, and test the chair for comfort, stability, and durability. With thoughtful preparation and simple design choices, outdated dining chairs can become attractive, functional pieces without the time and expense of full reupholstering.

 Captain Living